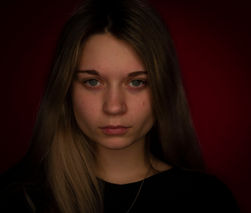
STUDIO LIGHTING
Emotional Portraits
Description:
Use your emotion assigned to create a multipart series using a variety of different techniques.
Day 1
Individually:
1. Come up with a list of 10 different emotions that you have felt over the past month.
2. Rank them in order from 1 to 10.
As a group
1. Assign your 3 choices to 3 of your peers.
2. Once you have your 3 emotions (from your peers), rank them in order.

Sketchbook
1. Address the background - 2 page spread. (5 points)
2. Trace your title on your sketchbook somewhere (does not need to be in the top left). (5 points)
3. Either Freewrite for 5 minutes or create an essential question and answer (10 points).
Create an essential question that starts with why or how about your emotion. Answer in a well developed paragraph.
4. Draw a detailed thumbnail for each. Label with all the photographer choices.
- Long exposure (using flash to stop movement or constant light to showcase blurriness)
- Still life (no people, at least 8 objects)
5. Decide on which 2 options you want to pursue from the list below. Draw a detailed thumbnail for each. Label with all the photographer choices.
- Bust portrait (shoulders up)
- Full Frame Portrait (single person)
- Knolling (link to examples here)
6. Find and print a good inspirational photo for each thumbnail sketch (4 total).
- Label the photo with how you plan on using it for inspiration.
Shadows in your final photo (you need to have them drawn in your thumbnail sketch!
Studio Lighting Things to Remember
We have lots of different backdrops (including different sizes and colors). Think outside of black and white.
We have lots of differnt modifiers. Do you want hard light or soft light?
We have gobos and cookies to cast shadows.
We have gels to change the color of the light.
Studio Lighting Notes
Shooting Requirements
Shooting Schedule
Day before:
1. Meet with your group to fill out the paperwork. Submit your paper to Mr. Hanson the day before the shoot.
Shooting Requirements
1. Take at least 12 high quality images.
2. Try different poses, different lighting set ups
3. Take an outshot
4. Take a note of what card your images are on.

Shooting Mistakes
Click on the images below to see detailed explanations of mistakes students typically make. Learn from them.

Digital Contact Sheet
Step 1: Make contact sheets
a. Make a new page on your website. Title it with the emotion you are portraying. Be sure it can be navigated to from your home page
b. Upload 12 -20 images, only jpegs (not raw files)
c. Be sure your images are not cropped. If applicable, make sure they can be clicked on.
d. Upload your outshot to the page
e. Publish your page
Video Tutorials

Post Processing Guide
"No amount of Photoshopping can make a bad image good"
Step 1: Edit your raw file
a. Decide on the 4-5 photos you want to edit
b. Open all the raw files (.nef or .dng) in Photoshop / lightroom at the same time.
c. Batch edit basic things
d. Individually tweak images as needed.
Step 2: Turn in your photo
a. Turn in on your website page (at the top as an individual image.
b. Also turn in via canvas with your outshot (2 images)
Tips:
- Keep it simple
- Consider putting your image in black and white if the colors do not work
Good Student Examples

Artist Statement
In paragraph form, answer the following questions:
a. What is the emotion you are portraying?
b. How did you use the "photography choices" to depict your emotion?
- Background color
- Body Language
- Clothing
- Facial Expression
- Props
- Type of light / light direction / lighting technqiues


