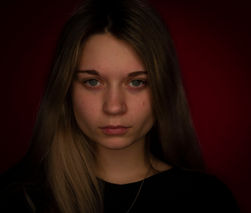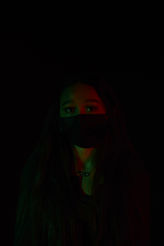
STUDIO LIGHTING
Emotional Portraits
Description:
Within your assigned group, create a portrait for each person in your group using the studio equipment at Howard High.
Things you must do:
- Have a photograph for each person in your group
- Shoot in RAW with a DSLR
- Shoot all of your photos in A226, A218, computer lab, and darkroom
Rules / Checklist:
- Everyone needs a different backdrop color.
- Each photo needs to depict the emotion assigned to you, no duplicates can be made within your group
- You must have at least 1 point of view change
- At least 1 person must use a prop
- No more than 1 face can be depicted in any photograph
- The lights must be modified in some way
Emotions: Cannot duplicate within the group
-
- use this link to dive into each emotion on a deeper level
Day 1
Individually:
1. Come up with a list of 10 different emotions that you have felt over the past month.
Meet with your group
1. Decide on a list of 8 different emotions.
- There can be no duplicates within the group
- These do not need to be self portraits.
- Each person will be the "creative director" for their photograph.
Studio Lighting Notes
Sketchbook
Process: Sketchbook (1 per person)
1. Create a 2 page spread using colors and techniques that showcase your emotion. Use your entire space. Design your page well.- (10 points)
2. Create an essential question that starts with why or how about your emotion. Answer in a well developed paragraph. (10 points)
3. Create 4 thumbnail sketches (20 points)
- At least 1 thumbnail sketch needs to have a prop
- Label with photo choices
- No stick figures, draw facial expressions and body language
5. Print out 2 inspirational photos that you can utilize within your photo shoot. Think about which photo choice you will be inspired by. Place them in your sketchbook and write down how you are inspired by them (10 points).
Tips:
- Shadows without a reason = lazy lighting
- You can use props, but each photo can only have 1 person in it
- The photographer choices are even more important with studio lighting, each choice is more impactful as you do not have an environment to showcase concepts
Student Examples
Shooting Requirements
Shooting Schedule
Day before:
1. Meet with your group to fill out the paperwork. Submit your paper to Mr. Hanson the day before the shoot.
Shooting Requirements
1. Take at least 12 high quality images.
2. Try different poses, different lighting set ups
3. Take an outshot
4. Take a note of what card your images are on.

Shooting Mistakes
Click on the images below to see detailed explanations of mistakes students typically make. Learn from them.

Good Student Examples

Video Tutorials
Studio Lighting Portraits
Studio Lighting Portraits


Final Specs and Unedited Exporting

Masking in LRC

Upload from Google Drive to LRC

Upload your images from SD Card
Digital Contact Sheet
Step 1: Make contact sheets
a. Make a new page on your website. Title it with the emotion you are portraying. Be sure it can be navigated to from your home page
b. Upload 12 Images only. Export as jpegs jpegs (not raw files)
c. Be sure your images are not cropped. If applicable, make sure they can be clicked on.
--- In weebly, click on your gallery, click on "more options" then click on aspect ratio... Be sure to check "none"
d. Upload your outshot to the page
e. Publish your page

Post Processing Guide
"No amount of EDITING can make a bad image good"
Artist Statement
In paragraph form, answer the following questions:
a. What is the emotion you are portraying?
b. Why did you chose this emotion?
b. How did you use the "photography choices" to depict your emotion? Reference each decision you made and how it impacts the viewers interpretation.
- Background color
- Body Language
- Clothing
- Facial Expression
- Props
- Type of light / light direction / lighting techniques
- How you selected your model or why?
Tips:
Be confident in your tone. Don't use interpretive phrases such as "I hope my viewer...." or "I want my viewer to feel..."
Do not use past tense. Instead of saying "My model was wearing...." use "My model is wearing..."
The blue background showcases .....
My model is wearing green to represent..... to emphasize....
The lightbulb in my models hand is representative of....
Less is more, no fluff


