top of page
Narrative Panorama
Story telling through extended space
Problem Statment:
Visually depict a story over the course of three connected images that form one composition.
Problem Statement
Sketchbook - Part 1
Directions:
1. Paint a 2 page spread in your sketchbook.
2. Divide your page into 4 sections, relatively even, but not square.
3. Go to the website, StoryCorps, and select 3 different questions. Write them down and answer them in 3 of the sections.
4. In the final section, come up with a fictitious story. Write down a brief synopsis about it.
Sketchbook Part 1
Student Examples


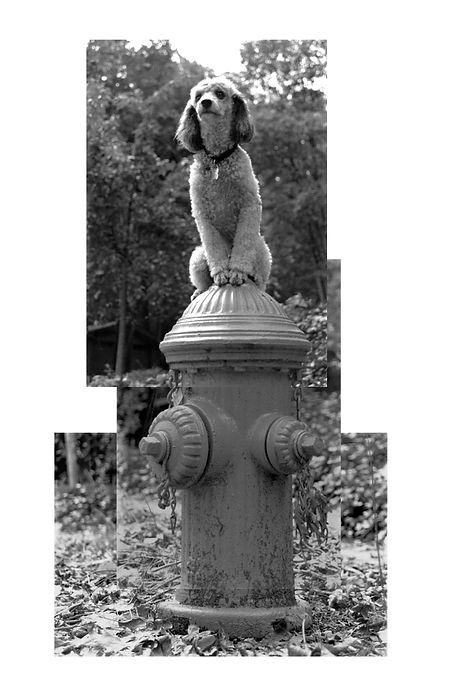
David Hilliard


Exemplar Images
David Hilliards Page: Linked here
For years I have been actively documenting my life and the lives of those around me, recording events and attempting to create order in a sometimes chaotic world. While my photographs focus on the personal, the familiar and the simply ordinary, the work strikes a balance between autobiography and fiction. Within the photographs physical distance is often manipulated to represent emotional distance. The casual glances people share can take on a deeper significance, and what initially appears subjective and intimate is quite often a commentary on the larger contours of life.
For me, the construction of panoramic photographs, comprised of various single images, acts as a visual language. Focal planes shift, panel by panel. This sequencing of photographs and shifting of focal planes allows me the luxury of guiding the viewer across the photograph, directing their eye; an effect which could not be achieved through a single image.
I continually aspire to represent the spaces we inhabit, relationships we create, and the objects with which we surround ourselves. I hope the messages the photographs deliver speak to the personal as well as the universal experience. I find the enduring power and the sheer ability of a photograph to express a thought, a moment, or an idea, to be the most powerful expression of myself, both as an artist, and as an individual.
Mr. Hanson's Example

Artist Statement:
Coming Soon
Teache Example
Sketchbook - Part 2
Directions:
1. For each section, create a narrative (story). Think about memories or specific instances that may relate to the answer.
2. Draw 2 thumbnail sketches (per section - 8 total) of what you want your final image to look like. - Needs to be at least 3 frames
- Label with photographer choices
- Must have lines depicting your individual frames
- Final image must incorporate symbolism (label in your thumbnail sketch) - an object that represents something more than it is (non ap)
- Must incorporate a character
- Must showcase an impossible situation, example: same person multiple times, changing size of objects
- Must be one cohesive composition
Sketchbook Part 2
Don't Do THis

Thumbnail Sketches


This is a story board. It shows a story over time though multiple compositions. You need to create 1 composition
Shooting Diagrams
Look at the diagrams below to see how each image was created using different camera angles. The angle and height of your camera need to stay consistent.
Do not use telephoto or wide angle lenses when possible


Shooting Diagrams
Shooting Requirments
1. Shoot 24 total photos.
2. Shoot 1 to 2 ideas from your sketchbook.
3. Shoot multiple frames for each panel of your composition.
4. Have your photos ready to edit / use in class on Tuesday.
Tips
1. Use a tripod if you can. If you cant, try to keep your phone at the same height and same angle.
2. Overlap your frames. Don't try to make it perfect in the camera. You can always crop down in post production.
3. Take multiple exposures of the same composition
- Change body language, facial expression, distance the subject is from the camera etc.
4. Shift your focus from frame to frame
- Phone - tap on screen
- SLR / DSLR - manually change focus
5. PLAN AHEAD, look at the diagrams above. Have a plan of how you are going to shoot your images before picking up your camera.
6. Take your sketchbook with you on the shoot.
7. Improvise... try something different than you intended.
Contact Sheet
1. Create a new page on your website. Title it "narrative panorama"
2. Upload your 24 images in a gallery format (be sure not to select a gallery that crops your images).
3. Create a textbox that answers the following questions.
a. What is the story you are portraying within your work?
b. How did you incorporate symbolism in your work?
c. What 3 frames (or more) are you going to use?
4. Publish your page
Contact Sheet
Editing
Watch the video for more intricate details on the following steps:
1. Choose 1 final panorama to work from.
2. Open all of your images in photoshop. They will open as new layers. if you cannot see the layers menu, go to the top toolbar (window => Layers)
3. Select one of your images (cmnd +A), copy (cmnd +C), go to the top tool bar to create a new document (file => new).
4. Update the size of the canvas to fit your panorma (make it bigger than you think it will need to be as you can crop down later).
5. Paste your image (cmnd +V), repeat with all of your images.
6. Arrange your images in the order you want them in. Overlap, or leave space between.
7. Edit each image individually to match contrast, color, etc. Use the Dodge / burn, levels, curves, etc.
Editing Video
Editing
Artist Statement
1. Turn your work in via canvas (must be a jpeg)
2. In the comment section, write (or copy and paste) an artist statement that addresses the following in paragraph form.
- What is the story you are portraying?
- Who are your characters? What are they doing?
- How did you incorporate symbolism in your panorama? Explain the metaphor and object
- How did you use the panorama format to showcase your idea in a different way than a single image?
---- think about shifting focal planes, creating an "impossible scene" (changing characters, clothing, changing the environment ect).
Artist Statemen
bottom of page